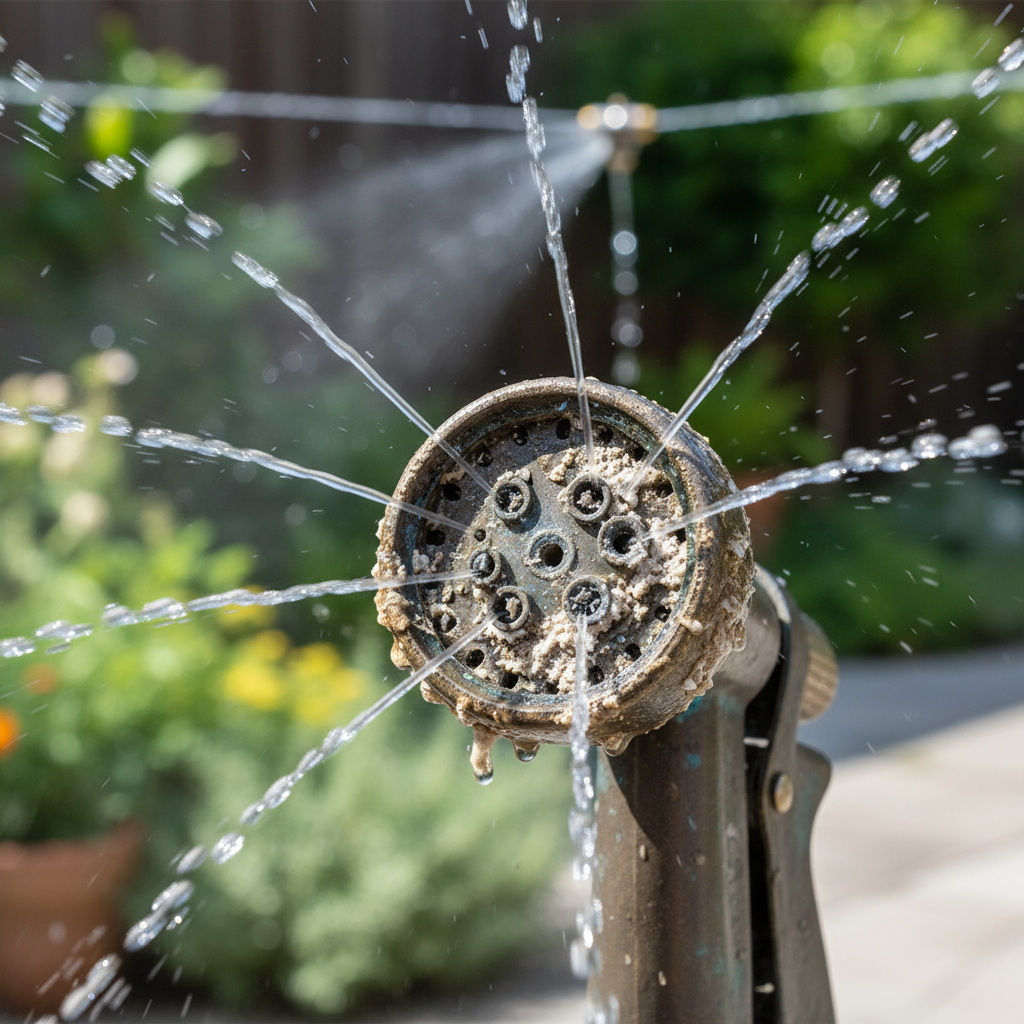
Mineral buildup can be a silent saboteur of household appliances and garden equipment, particularly any device featuring fine spray nozzles. From the intricate misting systems that cool outdoor patios to the everyday convenience of a garden hose sprayer, mineral deposits—primarily from hard water—can drastically reduce efficiency and eventually lead to complete blockages. If you’ve noticed a weakened spray, an erratic pattern, or a complete lack of water flow, chances are mineral buildup is the culprit. This comprehensive guide will equip you with the knowledge and techniques to thoroughly clean your nozzles, restoring them to optimal performance and extending their lifespan.
What is Mineral Buildup and Why Does it Affect Nozzles?
Mineral buildup refers to the accumulation of dissolved minerals, predominantly calcium and magnesium, that precipitate out of hard water. As water evaporates or passes through tiny openings, these minerals are left behind, forming stubborn, crusty deposits. Nozzles are especially vulnerable due to their incredibly small orifices, some as narrow as 0.005mm, making them highly susceptible to even the slightest mineral accumulation. This ongoing process acts like a slow-motion villain, gradually constricting the flow path until the nozzle becomes completely clogged. Beyond just hard water, sediment and even algae can contribute to these blockages, turning functional nozzles into ineffective components.
Types of Nozzles Prone to Mineral Buildup
Mineral buildup is a universal problem for any device that dispenses water through small openings. While the cleaning principles remain similar, the context of application can vary. Common examples include:
- Handheld Spray Nozzles: Frequently used in gardens, kitchens, and bathrooms, these nozzles deliver water for various tasks. They are often exposed to varying water qualities, leading to gradual mineral accumulation that can impair their spray patterns.
- Misting System Nozzles: Designed for evaporative cooling in outdoor spaces, these systems rely on extremely fine mist. Even minute deposits can cause significant disruptions, leading to reduced cooling power and uneven spray.
- Showerheads and Faucet Aerators: While not typically considered “nozzles” in the same vein as sprayers, these household fixtures suffer from identical mineral buildup issues, causing decreased water pressure and irregular flow. The techniques described here are often applicable to these items as well.
Essential Tools and Cleaning Solutions
Before diving into the cleaning process, gathering the right tools and selecting an appropriate cleaning agent will ensure efficiency and safety.
Gathering Your Cleaning Arsenal
Effective nozzle cleaning often requires more than just a quick rinse. You’ll need:
- Basic Tools: A small bowl or container for soaking, a soft brush (an old toothbrush works perfectly), a clean cloth for drying, and possibly pliers if your nozzles require disassembly.
- Safety Gear: For certain cleaning solutions, wearing rubber gloves is essential to protect your skin. Good ventilation is also advisable when working with stronger chemicals.
|
Our Picks for the Best Handheld garment steamer in 2026
As an Amazon Associate I earn from qualifying purchases.
|
||
| Num | Product | Action |
|---|---|---|
| 1 | Conair Handheld Garment Steamer for Clothes, ExtremeSteam 1200W, Portable Handheld Design,White/Blue |

|
| 2 | BEAUTURAL Steamer for Clothes, Portable Handheld Garment Fabric Wrinkles Remover, Aluminun Heating Plate, 35-Second Fast Heat-up, Large Detachable Water Tank (Only for 120V), Blue |
|
| 3 | Bear Steamer for Clothes, Handheld Clothes Steamer,1300W Strong Power Garment Steamer with 230ml Tank,Fast Heat-up, Auto-Off, Steam Iron Fabric Wrinkle Remover with Brush for Home and Travel |
|
| 4 | OGHom Portable Travel Handheld Steamer for Clothes, Garment Wrinkle Remover, 1000W Strong Penetrating Fabric Steamer, for Home, Office, Travel (ONLY FOR 120V) -White |
|
| 5 | Conair Handheld Garment Steamer for Clothes, Turbo ExtremeSteam 1875W Fabric Steamer, Portable Handheld Design, Strong Penetrating Steam, Amazon Exclusive, Black |
|
| 6 | Jack & Rose Travel Steamer for Clothes,100-220V Portable Iron,15s Heat Up,Steamer & Iron 2 In 1, Travel Size,Large Ceramic Heat Panel,for Global and Europe |
|
| 7 | Conair Handheld Garment Steamer for Clothes, Turbo ExtremeSteam 1875W Fabric Steamer, Portable Handheld Design, Strong Penetrating Steam, White/Champagne |
|
| 8 | HiLIFE Steamer for Clothes, Portable Handheld Clothing Steamer, 240ml Big Capacity, 700W, Strong Power, Fabric Quick Wrinkle Remover with Brush for Home, Office(ONLY 120V) -Blue |
|
| 9 | HiLIFE Upgraded Steamer for Clothes, Handheld & Portable, 1100W Powerful Steam, 300ml Big Capacity & No Leak Design, 30S Fast Heat-up, Quick Wrinkle Remover, Compact Size for Travel, ONLY 120V |
|
| 10 | HiLIFE Steamer for Clothes, Portable Handheld Design, 240ml Big Capacity, 700W, Strong Penetrating Steam, Removes Wrinkle, for Home, Office(ONLY FOR 120V)-Black |
|
Choosing the Right Cleaning Agent
The severity of the mineral buildup will dictate the best cleaning agent. Each option offers distinct advantages and disadvantages:
- White Vinegar: This household staple is a favorite for regular maintenance due to its food-safe, eco-friendly nature. It’s excellent for dissolving less stubborn deposits and can even give brass nozzles a gleaming finish. For best results, use it at full strength or mixed 1:1 with water.
- CLR (Calcium, Lime & Rust Remover): For those formidable, calcified deposits that laugh at vinegar, a commercial cleaner like CLR works wonders. It’s particularly effective in areas with very hard water. Remember to use it in a well-ventilated area and always wear gloves, as it is a strong chemical solution. It can often be diluted according to product instructions.
- Citric Acid: Offering an eco-friendly middle ground between vinegar and CLR, citric acid powder is surprisingly effective. You can prepare a solution by boiling 2 tablespoons per liter of water for about 15 minutes, then letting it cool before soaking your nozzles. It’s biodegradable and a strong contender for stubborn buildup without harsh chemicals.
- Mild Dish Soap & Warm Water: This gentle solution is ideal for an initial rinse to loosen surface debris or for light maintenance. While not strong enough for heavy mineral deposits, it can help prepare nozzles for a more potent cleaning agent.
Step-by-Step Guide to Cleaning Nozzles
Cleaning mineral buildup from nozzles is a straightforward process when approached systematically. Follow these steps for best results:
Preparation and Disassembly
The first crucial step is to isolate the nozzles from their water source. If cleaning garden hose nozzles, simply detach them from the hose. For system nozzles, such as those in a misting setup, ensure the system is shut down and depressurized before carefully removing each nozzle. Pay attention to any small components like O-rings, keeping them separate and safe, as they are vital for proper reassembly and preventing leaks. Some nozzles might require gentle twisting with pliers to break a seal before unscrewing.
The Soaking Process
Once detached, place the nozzles in a small bowl or container filled with your chosen cleaning solution. For light to moderate buildup, a white vinegar soak for 30 minutes to a few hours, or even overnight, is often sufficient. For heavier, more stubborn deposits, use a diluted CLR solution or the prepared citric acid solution, soaking for 3 to 60 minutes. Ensure the nozzles are fully submerged in the solution to allow the active ingredients to penetrate and dissolve the mineral crusts.
Scrubbing and Rinsing
After soaking, remove the nozzles from the solution. Take a soft brush, like an old toothbrush, and gently scrub the nozzle openings and any visible crevices. This helps dislodge any loosened mineral particles. It is paramount to avoid using metal objects such as pins, paper clips, or screwdrivers, as these can easily damage the delicate nozzle orifices, permanently affecting their spray pattern or flow. Once scrubbed, rinse the nozzles thoroughly under warm running water to wash away the cleaning solution and any remaining debris. Ensure all soap or cleaning agent is completely rinsed off.
Drying and Reassembly
After rinsing, pat the nozzles dry with a clean cloth or allow them to air dry completely. Before reassembling, inspect all parts, including O-rings, springs, and ball mechanisms, to ensure they are clean and in their correct positions. Carefully screw the nozzles back into place, hand-tightening to avoid over-tightening which can damage threads or distort O-rings. Once reassembled, test the nozzle by running water through it to confirm it’s functioning properly with a consistent spray pattern and no leaks.
Advanced Cleaning Techniques and Preventative Measures
For truly challenging clogs or to minimize future buildup, consider these advanced techniques and preventative strategies.
Tackling Stubborn Clogs
Even after a good soak and scrub, some particularly stubborn mineral plugs might remain. For these, an ultrasonic jewelry cleaner filled with a vinegar solution can be remarkably effective. The ultrasonic vibrations create tiny scrubbing brushes inside every crevice, dislodging even microscopic particles. Additionally, a burst of compressed air can be used to blast out any lingering mechanical debris once the mineral deposits have been softened or removed. This method is especially useful for clearing internal channels that a brush can’t reach.
Maintaining Nozzle Health
Prevention is often the best cure when it comes to mineral buildup. Establishing a regular cleaning schedule is key; most systems benefit from nozzle cleaning at least once per season, though areas with extremely hard water may require monthly attention. Regularly inspecting your nozzles for signs of clogging, such as reduced output or uneven spray patterns, allows you to address issues before they become severe. Where possible, consider using filtered water in systems that are highly susceptible to mineral deposits, as this can significantly reduce the rate of buildup and extend the time between cleanings.
Comparison of Common Cleaning Methods
Choosing the right method depends on the type of nozzle and the extent of the mineral buildup. Here’s a quick comparison:
| Method | Effectiveness for Mineral Buildup | Safety/Eco-friendliness | Typical Soak Time | Best For |
|---|---|---|---|---|
| White Vinegar | Moderate to Good | High | 30 minutes to overnight | Regular maintenance, light to medium buildup |
| CLR | Excellent | Low (chemical) | 3-15 minutes | Stubborn, heavy buildup, hard water areas |
| Citric Acid | Good | High | 15-30 minutes | Eco-friendly alternative to CLR |
| Mild Dish Soap | Low | High | 10-15 minutes | Initial cleaning, light residue |
Expert Insights on Nozzle Care
Maintaining your nozzles goes beyond just cleaning; it involves understanding their vulnerabilities and treating them with care.
“A clogged nozzle doesn’t just reduce your cooling power – it can wreck your customers’ comfort faster than you can say ‘My misters aren’t misting!'” – This insight underscores the critical impact of even a single clogged nozzle on overall system performance and user experience.
“Always remember to use a non-corrosion cleaning agent. Never use a metal object to clean a spray nozzle and always use a material which is softer than the nozzle material.” – This crucial advice highlights the importance of protecting the delicate components of a nozzle, ensuring its longevity and proper function.
In conclusion, maintaining clean, clear nozzles is essential for optimal performance, whether you’re watering your garden, cooling your patio, or ensuring a consistent shower. By understanding the causes of mineral buildup and employing the right tools and techniques, you can effectively combat clogs and extend the life of your equipment. Regular cleaning with appropriate solutions like white vinegar, CLR, or citric acid, combined with gentle scrubbing and careful reassembly, will keep your nozzles spraying perfectly. Don’t let mineral buildup diminish your device’s potential; take action and enjoy consistent, clear water flow every time. What improvements in performance do you hope to see after cleaning your nozzles?
Frequently Asked Questions
What causes nozzles to clog with mineral buildup?
Nozzles typically clog due to hard water, which contains high levels of dissolved minerals like calcium and magnesium. As water evaporates or passes through the tiny nozzle openings, these minerals are left behind and accumulate over time, forming hard deposits. Sediment and even algae can also contribute to these blockages, leading to reduced water flow and inefficient operation.
Can I use bleach to clean my nozzles?
No, it is strongly advised against using bleach to clean nozzles. Bleach can be corrosive to metal components, especially brass, which is commonly used in many nozzles. It can cause degradation and damage to the nozzle material, leading to premature failure or altered spray patterns. Always opt for non-corrosive cleaning agents like vinegar, CLR, or citric acid.
How often should I clean my nozzles?
The frequency of nozzle cleaning largely depends on your water hardness and how often you use the device. For areas with hard water, a monthly cleaning might be necessary. In other regions, a seasonal cleaning (e.g., once every three to six months) should suffice to prevent significant buildup. Regular inspection for signs of reduced flow or uneven spray can also help determine when cleaning is needed.
What’s the best way to clean very small nozzle openings?
For extremely small nozzle openings, a combination of soaking and gentle mechanical action is most effective. First, soak the nozzles in a strong descaling solution like CLR, white vinegar, or citric acid to dissolve the mineral buildup. After soaking, use a soft-bristled brush, such as an old toothbrush, to gently clear any remaining debris. For internal clogs, an ultrasonic cleaner with a vinegar solution or a careful blast of compressed air can be highly effective without risking damage.
Is it safe to use CLR on all types of nozzles?
While CLR is highly effective for mineral buildup, it’s a strong chemical cleaner and caution is advised. It is generally safe for most common nozzle materials like brass and plastic, but it’s always best to check the manufacturer’s recommendations for your specific nozzle type. Always dilute CLR as per product instructions, wear gloves, ensure good ventilation, and perform a small test in an inconspicuous area if unsure about material compatibility.