A leaking water tank can be more than just an annoyance; it can lead to significant water wastage, property damage, and even inflated utility bills. While the idea of tackling such a repair might seem daunting, many common water tank leaks can be addressed safely and effectively with a do-it-yourself approach. This guide will walk you through identifying the problem, choosing the right repair method, and ensuring a lasting fix, all while keeping safety paramount.
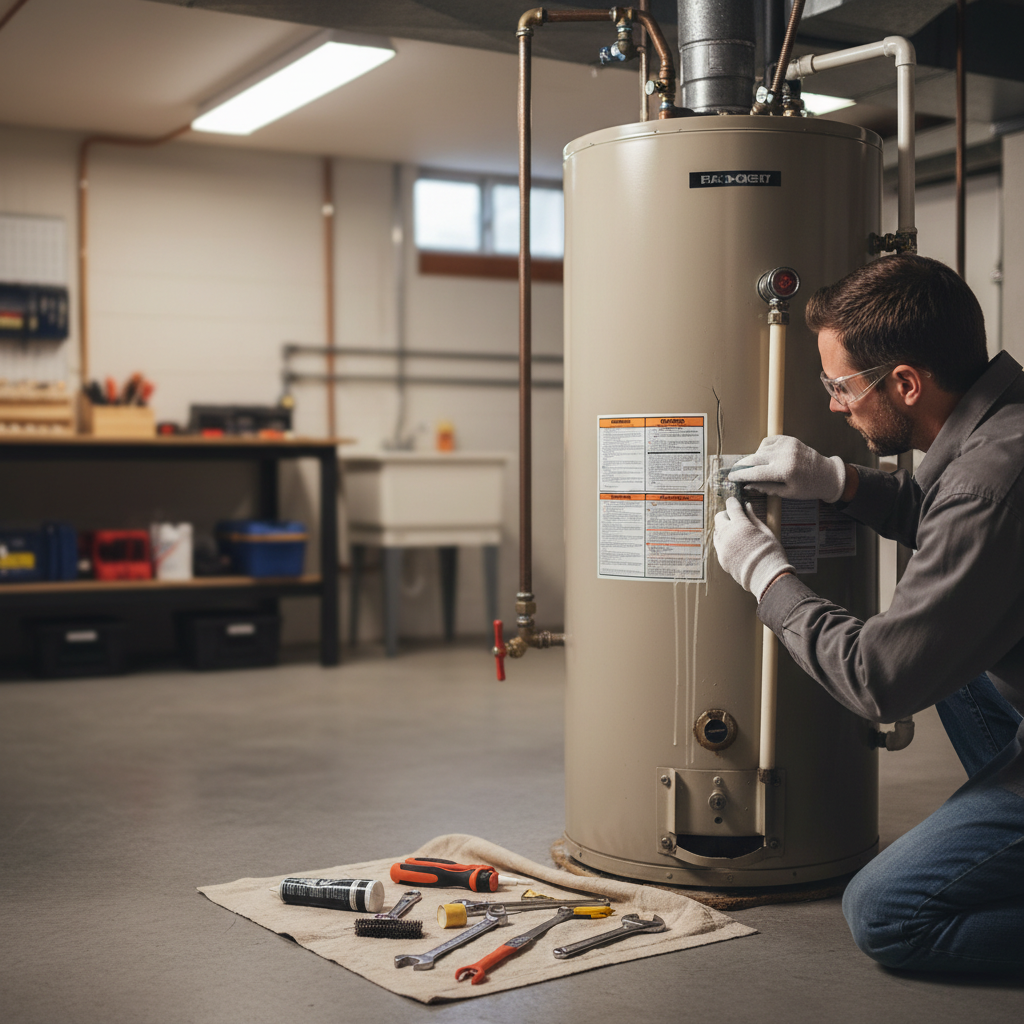
What is a Water Tank and How Does it Work?
A water tank is a stable containment unit designed to store water for various purposes, from household use to agricultural or industrial applications. Whether made of plastic, fiberglass, or metal, its primary function is to hold a reserve of water, ensuring a steady supply even when the main source is interrupted or insufficient. Unlike a traditional iron, a water tank doesn’t generate heat or steam; rather, it’s a passive storage vessel.
The tank connects to your water system via inlet and outlet pipes, often including valves for controlling water flow and drains for maintenance. The fundamental operation is simple: water flows in to fill the tank, and gravity or pressure systems distribute it out as needed. Over time, factors like age, environmental exposure, and physical damage can compromise the tank’s integrity, leading to leaks.
Compared to more complex plumbing systems, a water tank’s function is straightforward, but its continuous service makes it susceptible to wear and tear. Understanding its basic role helps in appreciating why regular maintenance and timely repairs are crucial for both hygiene and longevity.
Types of Water Tanks and Common Leak Causes
Water tanks come in various materials and designs, each with specific vulnerabilities. Identifying your tank type and the common causes of leaks for that material is the first step toward an effective repair.
Common Water Tank Materials
- Plastic Water Tanks: These are prevalent in residential and agricultural settings due to their lightweight nature, corrosion resistance, and affordability. They are often made from polyethylene.
- Metal Water Tanks: Typically made from galvanized steel, stainless steel, or sometimes fiberglass-lined steel, these tanks are known for their durability and strength. They are common in hot water heaters and larger storage systems.
- Fiberglass Water Tanks: Offer a good balance of strength and corrosion resistance, often used for underground storage or specialized applications.
|
Our Picks for the Best Handheld garment steamer in 2026
As an Amazon Associate I earn from qualifying purchases.
|
||
| Num | Product | Action |
|---|---|---|
| 1 | Jack & Rose Travel Steamer for Clothes,100-220V Portable Iron,15s Heat Up,Steamer & Iron 2 In 1, Travel Size,Large Ceramic Heat Panel,for Global and Europe |

|
| 2 | Bear Steamer for Clothes, Handheld Clothes Steamer,1300W Strong Power Garment Steamer with 230ml Tank,Fast Heat-up, Auto-Off, Steam Iron Fabric Wrinkle Remover with Brush for Home and Travel |
|
| 3 | Conair Handheld Garment Steamer for Clothes, ExtremeSteam 1200W, Portable Handheld Design,White/Blue |
|
| 4 | OGHom Portable Travel Handheld Steamer for Clothes, Garment Wrinkle Remover, 1000W Strong Penetrating Fabric Steamer, for Home, Office, Travel (ONLY FOR 120V) -White |
|
| 5 | Conair Handheld Garment Steamer for Clothes, Turbo ExtremeSteam 1875W Fabric Steamer, Portable Handheld Design, Strong Penetrating Steam, White/Champagne |
|
| 6 | HiLIFE Upgraded Steamer for Clothes, Handheld & Portable, 1100W Powerful Steam, 300ml Big Capacity & No Leak Design, 30S Fast Heat-up, Quick Wrinkle Remover, Compact Size for Travel, ONLY 120V |
|
| 7 | Conair Handheld Garment Steamer for Clothes, Turbo ExtremeSteam 1875W Fabric Steamer, Portable Handheld Design, Strong Penetrating Steam, Amazon Exclusive, Black |
|
| 8 | HiLIFE Steamer for Clothes, Portable Handheld Clothing Steamer, 240ml Big Capacity, 700W, Strong Power, Fabric Quick Wrinkle Remover with Brush for Home, Office(ONLY 120V) -Blue |
|
| 9 | BEAUTURAL Steamer for Clothes, Portable Handheld Garment Fabric Wrinkles Remover, Aluminun Heating Plate, 35-Second Fast Heat-up, Large Detachable Water Tank (Only for 120V), Blue |
|
| 10 | HiLIFE Steamer for Clothes, Portable Handheld Design, 240ml Big Capacity, 700W, Strong Penetrating Steam, Removes Wrinkle, for Home, Office(ONLY FOR 120V)-Black |
|
Causes of Water Leakage
Leaks rarely appear without a reason. Understanding the root cause helps in choosing the correct repair method and preventing future occurrences.
- Wear and Tear Over Time: All materials degrade. Plastic tanks can become brittle due to prolonged exposure to UV rays and extreme temperatures, leading to small cracks. Metal tanks can rust or corrode, especially at seams or stress points.
- Physical Damage: Accidental impacts from heavy objects or rough handling during installation, cleaning, or maintenance can cause cracks, punctures, or dents.
- Poor Installation/Foundation: An uneven or unstable base can create stress points on the tank walls, leading to cracks. Improper connections at inlet or outlet points can also cause leaks.
- Faulty Fittings and Joints: Most water tanks have several fittings for pipes, hoses, or valves. Leaks frequently occur at these connection points if they are loose, worn out, or incorrectly sealed.
- Overfilling: Filling a tank beyond its intended capacity puts excessive pressure on the walls, potentially causing seams to split or cracks to form.
- Manufacturing Defects: Although rare, inherent weaknesses in the tank material from the manufacturing process can lead to leaks over time. Regular inspection can catch these early.
Identifying the Source of a Water Leak
Before attempting any repair, accurately locating the leak is essential. A thorough inspection can save you time and effort.
- Visual Inspection: Carefully inspect the tank’s exterior for visible cracks, holes, or damp spots. Pay close attention to joints, seams, and areas of constant stress, like the base and corners.
- Dry the Tank (if possible): If the leak isn’t immediately obvious, completely empty the tank and allow it to dry. This makes small cracks and weak points much easier to spot.
- Use Soapy Water: For tiny, hard-to-find leaks, mix water with soap and apply it to suspected areas. Refill the tank slowly; if bubbles form, you’ve found the leak.
- Check Fittings and Valves: Leaks around plumbing connections are common and can be mistaken for tank body cracks. Ensure all valves, pipes, and joints connected to the tank are properly sealed.
- Food Coloring Test: For subtle leaks in a full tank, add a few drops of food coloring. The color will help trace the water’s escape route.
Once you’ve pinpointed the leak’s exact location and size, you can better determine the appropriate repair method.
Essential Tools and Materials for DIY Repair
Having the right tools and materials on hand is crucial for a successful and safe DIY water tank repair. The specific items will depend on the tank material and the nature of the leak.
General Safety Gear
- Safety Goggles: To protect your eyes from debris, chemicals, or splashes.
- Gloves: Chemical-resistant gloves are recommended when handling sealants, epoxies, or cleaning agents.
- Work Clothes: Old clothes that you don’t mind getting dirty.
Cleaning and Preparation
- Buckets and Hoses: For draining and refilling the tank.
- Wire Brush or Scraper: To remove loose rust, paint, or debris from metal tanks.
- Sandpaper (coarse and fine): To roughen surfaces for better adhesion of repair materials.
- Degreaser or Mild Detergent: For thoroughly cleaning the leak area.
- Clean Rags or Towels: For drying surfaces.
- Heat Gun (optional): For drying tough spots or aiding plastic welding.
Repair Materials (Choose based on tank type and leak)
- Epoxy Putty/Resin: A versatile, waterproof, and strong bonding agent suitable for minor cracks and holes in both plastic and metal tanks. Ensure it’s rated for potable water if applicable.
- Examples: JB Weld WaterWeld, Quick Steel.
- Plastic Welding Kit (for plastic tanks): Includes a heat gun and plastic welding rods (matching the tank material, e.g., polyethylene). This offers a highly durable, permanent repair for larger cracks.
- Fiberglass Repair Kit (for larger damage on plastic or fiberglass tanks): Contains fiberglass mat and resin, forming a robust patch.
- Waterproof Sealants: Silicone-based or specialized tank sealants for minor cracks or as an added layer over other repairs. Ensure food-grade if needed.
- Waterproof Repair Tape: A temporary or supplementary fix for minor leaks, often used with sealants.
- Rubber Patches and Clamps: For larger holes in metal tanks, a rubber patch secured with hose clamps can provide a strong seal.
- Replacement Fittings/Washers: If the leak is at a connection point, new pipe fittings, rubber washers, or threaded tape might be needed.
“When selecting repair materials, always check if they are suitable for potable water if your tank stores drinking water. Safety and non-toxicity are paramount.” – John Doe, Master Plumber with 20+ years of experience.
Step-by-Step DIY Water Tank Repair Guide
Once you’ve identified the leak and gathered your materials, follow these steps for a safe and effective repair.
Phase 1: Preparation and Safety
- Turn Off Water Supply: Locate the main water shut-off valve to your tank and turn it off. For hot water tanks, also turn off the power supply (gas or electricity).
- Drain the Tank: Open a faucet or the tank’s drain valve to empty the tank completely. This depressurizes the system and allows access to the leak site.
- Clean the Area: This is critical for any repair material to adhere properly.
- For Plastic Tanks: Remove dirt, algae, and loose plastic. Use soap and water, then sand the area around the crack with coarse sandpaper to roughen the surface for better adhesion. Dry thoroughly.
- For Metal Tanks: Scrape off any rust, loose paint, or debris with a wire brush or scraper. Sand the area to create a clean, slightly abraded surface. Clean with a degreaser and dry completely.
- Enlarge the Crack (Optional, for better adhesion): For very fine cracks, sometimes a small V-groove can be carefully ground or carved along the crack line to allow the repair material to penetrate deeper and form a stronger bond.
Phase 2: Applying the Repair
The method depends on the leak type and tank material.
Method 1: Epoxy Putty/Resin (for minor cracks and holes)
This is a common and versatile DIY solution for small leaks in both plastic and metal tanks.
- Mix the Epoxy: Follow the manufacturer’s instructions precisely. Epoxy putty typically requires kneading two components until a uniform color is achieved.
- Apply the Putty: Firmly press the mixed epoxy into and over the crack or hole, ensuring it fully covers the damaged area and extends slightly beyond its edges.
- Smooth and Cure: Smooth the surface. Allow the epoxy to cure for the recommended time, usually several hours to overnight. Do not rush this step.
Method 2: Plastic Welding (for larger cracks in plastic tanks)
This is a more permanent solution requiring specific tools and a steady hand.
- Heat the Area: Using a heat gun, gradually heat the plastic around the crack until it starts to soften.
- Weld the Crack: Introduce a plastic welding rod (made of the same material as the tank) into the softened plastic, fusing it into the crack. Work slowly, ensuring a complete seal.
- Cool Down: Allow the welded area to cool and solidify completely.
Method 3: Fiberglass Patch (for extensive damage on plastic/fiberglass tanks)
Ideal for large holes or wide cracks where simple putty isn’t enough.
- Prepare Resin: Mix the fiberglass resin according to the product instructions.
- Apply Resin: Apply a layer of mixed resin around the cleaned and sanded damaged area.
- Place Mat: Cut a fiberglass mat to size, overlapping the leak by at least an inch in all directions. Place it over the resin.
- Saturate with Resin: Apply another layer of resin over the fiberglass mat, ensuring it is fully saturated.
- Cure: Allow the patch to cure completely.
Method 4: Waterproof Sealants and Tapes (for temporary or very minor leaks)
These are quick fixes but often not permanent.
- Dry Area: Ensure the area around the leak is completely dry.
- Apply Sealant: Apply a waterproof sealant designed for tanks directly to the crack or hole.
- Apply Tape: For added protection, or if using tape alone, apply waterproof tape firmly over the sealant or directly on the leak, extending well beyond the damaged area.
Phase 3: Post-Repair and Refilling
- Inspect Repair: Once the repair material has fully cured, visually inspect it to ensure a complete and solid seal.
- Refill Slowly: Close the drain valve and slowly turn on the water supply to the tank. Watch the repaired area closely for any signs of leakage.
- Check for Leaks: As the tank fills, check for drips or moisture at the repair site. If you see any, you may need to drain, clean, and re-apply the repair.
When to Call a Professional or Replace the Tank
While many leaks are DIY-friendly, some situations warrant professional help or even a full tank replacement. Knowing when to call it quits can save you time, money, and potential headaches.
Signs You Might Need a Professional
- Structural Damage: If the tank walls are warped, bulging, or significantly corroded beyond a small patch.
- Leaks at Critical Seams/Welds: Repairs in high-stress areas like the bottom seam of a hot water heater can be complex and require specialized welding or brazing skills.
- Internal Leaks: If you suspect an internal leak that you cannot access, a professional will have the tools and expertise to diagnose and repair it.
- Gas or Electrical Connections: For hot water tanks, if the leak is near gas lines or electrical components, it’s a major safety hazard. Always call a qualified plumber or HVAC technician.
- Uncertainty: If you are unsure about the cause of the leak or the best repair method, it’s always safer to consult an expert.
When to Replace the Tank
- Multiple Cracks or Extensive Damage: If your tank has numerous cracks or large holes, continuous repairs become impractical and ultimately more expensive than replacement.
- Weakened Structure: Visible signs of the tank’s material thinning, extensive rust (for metal tanks), or significant warping indicate a compromised structure.
- Frequent Leaks: If you find yourself repeatedly patching up new leaks, it’s a clear sign that the tank is at the end of its lifespan and a replacement will be more cost-effective in the long run.
- Age of the Tank: Most water tanks have a lifespan (e.g., 8-12 years for hot water heaters). If your tank is old and leaking, replacement is often the most prudent choice.
- Contamination Concerns: If the leak repair involves materials that are not food-grade certified and the tank holds potable water, replacement may be necessary to ensure water safety.
Maintaining Your Water Tank Post-Repair
After successfully repairing a leak, maintaining your water tank is crucial to prevent future issues and extend its lifespan. A little ongoing care goes a long way.
- Regular Inspections: Periodically check the tank for any new signs of stress, such as tiny cracks, moisture trails, or corrosion on fittings. Early detection can prevent minor issues from becoming major leaks.
- Avoid Overfilling: Ensure the tank is not filled beyond its capacity, as this puts undue stress on its walls and seams.
- Level Surface: Confirm that the tank continues to sit on a level and stable surface. An uneven base can cause pressure points that lead to cracks.
- Gentle Cleaning: When cleaning the tank, avoid using harsh tools or abrasive scrubbers that could damage the surface, especially on plastic tanks. Opt for soft brushes and mild cleaning agents.
- UV Protection: If your plastic tank is exposed to significant sunlight, consider a tank with UV protection or a protective cover to prevent material degradation and embrittlement.
- Check Fittings Regularly: Periodically tighten or inspect pipe fittings, valves, and connections. Worn-out washers or loose connections are common leak points.
By incorporating these maintenance tips into your routine, you can significantly enhance the durability of your water tank and minimize the likelihood of future leakage problems.
Buying Guide: What to Consider for Future Tank Purchases
If your current tank is beyond repair, or you’re planning for a new installation, making an informed decision about a replacement is key. This guide helps you navigate the options.
Your Budget
Water tanks come in a wide range of prices.
- Economy Models: Often plastic, suitable for non-potable uses or smaller storage needs, offering basic functionality.
- Mid-Range Tanks: Typically offer better materials, features like UV protection, and enhanced durability for general household use.
- Premium Tanks: Feature advanced materials (e.g., multi-layered plastic, stainless steel), superior insulation, longer warranties, and smart features.
Compare prices across reputable suppliers and consider the long-term value, not just the initial cost.
Reliable Brands
Researching reputable manufacturers is vital for ensuring quality and reliable after-sales support. Look for brands known for:
- Material Quality: Use high-grade plastics, corrosion-resistant metals, or durable fiberglass.
- Construction Integrity: Strong seams, uniform wall thickness, and robust fittings.
- Warranty: A good warranty reflects the manufacturer’s confidence in their product.
- Customer Service: Accessible support for questions or issues.
Investigate their track record, particularly concerning leak resistance and material longevity under local environmental conditions.
User Reviews and Expert Opinions
Before making a purchase, leverage the experiences of other users:
- Online Reviews: Check product reviews on e-commerce sites, forums, and specialized review platforms. Pay attention to comments regarding durability, ease of installation, and common issues.
- Expert Reviews: Look for assessments from plumbers, home improvement specialists, or consumer reports. They often provide insights into performance, efficiency, and common failure points.
- Local Feedback: Talk to neighbors or local professionals about what brands and types perform best in your specific climate and water conditions.
Focus on feedback related to the tank’s long-term performance, leak resilience, and the effectiveness of warranty claims.
Conclusion
Addressing a leaking water tank with a DIY approach is a practical and often cost-effective solution, provided you prioritize safety, accurately identify the leak, and choose the correct repair method. From thoroughly cleaning the damaged area to applying the appropriate sealant, epoxy, or patch, each step plays a vital role in restoring your tank’s integrity. While minor cracks and holes can often be fixed at home, it’s crucial to recognize when structural damage, critical component failure, or repeated leaks signal the need for professional intervention or a complete tank replacement. By following these guidelines and committing to regular maintenance, you can ensure your water storage remains reliable and leak-free for years to come.
What steps will you take today to ensure your water tank is in optimal condition?
Frequently Asked Questions
Can I use household glue to fix a leaking water tank?
No, household glues are generally not suitable for repairing water tanks. They are typically not waterproof, lack the necessary durability to withstand water pressure and weight, and may not be food-grade safe for potable water. Always use specialized sealants, epoxies, or repair kits designed for water tank use.
How long will an epoxy putty repair last?
An epoxy putty repair, if applied correctly, can last for several years, especially for minor cracks. However, it’s often considered a temporary or semi-permanent fix for small leaks. For larger cracks or extensive damage, more permanent solutions like plastic welding or fiberglass patching may be required for optimal longevity.
Is it safe to drink water from a repaired plastic tank?
It is generally safe to drink water from a repaired plastic tank, provided that all repair materials used are non-toxic and specifically designed and certified for use with potable water tanks. Always follow the manufacturer’s guidelines for curing times and thoroughly clean the tank before refilling it with drinking water.
What causes most water tank leaks?
Most water tank leaks stem from a combination of factors including natural wear and tear over time, exposure to harsh weather (especially UV rays for plastic tanks), physical impacts or damage, poor installation leading to uneven pressure, and faulty fittings or loose connections at pipe inlets and outlets.
Can I fix a leak in a metal water tank?
Yes, minor leaks in metal water tanks can often be fixed using DIY methods. Common approaches include applying waterproof epoxy putties, specialized sealants, or using rubber patches secured with clamps. For larger or more complex leaks, especially those involving critical seams or significant corrosion, professional welding or replacement might be necessary.